 Save
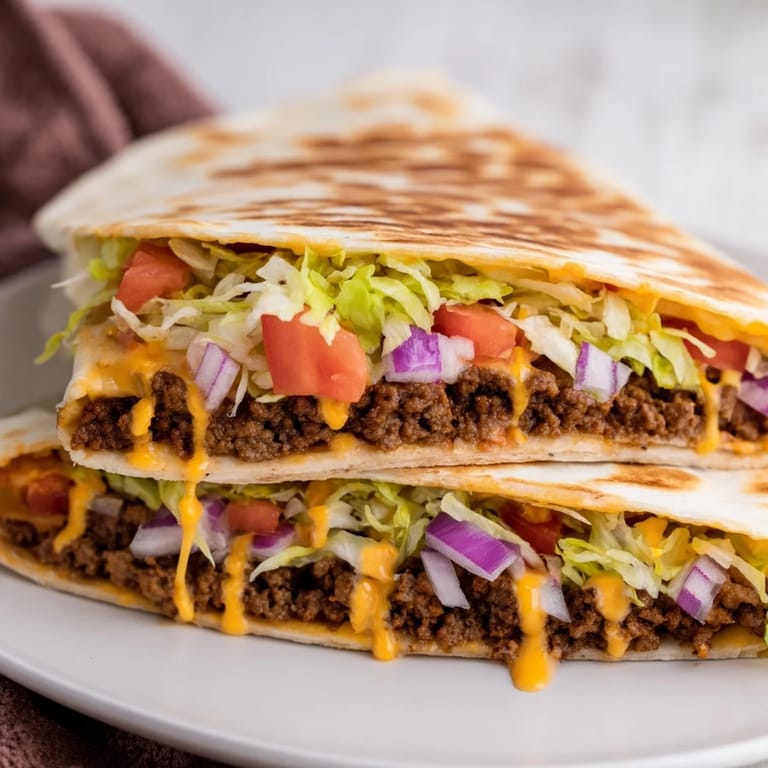
Save The first time I tried to recreate the Crunchwrap Supreme at home, I was standing in my kitchen at midnight on a Friday, armed with nothing but ambition and a vague memory of the satisfying crunch when you bite through that perfect tortilla shell. My roommate had been raving about it all week, and I thought, how hard could it be? Turns out, it's easier than you'd think—and somehow tastes even better when you've grilled it yourself in your own skillet. There's something magical about folding all those layers into one golden, crispy pocket that makes you feel like you've unlocked a secret menu hack.
I made these for a group of friends who showed up unannounced one Saturday afternoon, and watching their faces when they realized it was homemade—not from Taco Bell—was worth every minute of assembly. One friend kept asking me for the secret, convinced I'd somehow smuggled in a tostada shell from the restaurant, and I had to laugh and show her the exact steps. Since then, whenever someone mentions wanting fast food, I know exactly what to make instead.
Ingredients
- Ground beef: One pound gives you enough seasoned beef for four generous wraps, and cooking it all at once saves you time and keeps the flavors consistent.
- Taco seasoning: The packet version is quick and reliable, but if you have cumin, chili powder, and garlic powder on hand, you can skip the packet entirely.
- Nacho cheese sauce: Store-bought works perfectly and is honestly worth it for the creamy, slightly salty base that holds everything together.
- Flour tortillas: Get the 10-inch ones—they need to be big enough to fold over all those fillings without tearing.
- Tostada shells: These are the star player here, giving you that crucial crunch that separates a Crunchwrap from just a regular wrap.
- Sour cream: It adds richness and a cool contrast to all the warm, savory layers.
- Fresh lettuce and tomato: Don't skip the fresh toppings—the coolness and crispness are what make each bite balanced.
- Cheddar cheese: Shredded works best because it melts and distributes evenly across the shell.
Tired of Takeout? 🥡
Get 10 meals you can make faster than delivery arrives. Seriously.
One email. No spam. Unsubscribe anytime.
Instructions
- Brown the beef and season it:
- Heat your skillet over medium and let the ground beef get golden, breaking it up as it cooks—it should take about 6 to 8 minutes and smell amazing. Once it's no longer pink, drain off the excess fat, add the seasoning and water, and let it simmer for a couple minutes until the sauce thickens around the meat.
- Warm your cheese sauce:
- Whether you're heating it in a saucepan or following the can instructions, you want it pourable and hot but not scalding. A few minutes on low heat does the trick.
- Lay out your first tortilla:
- Spread it flat on your counter or cutting board and imagine you're about to create a little edible construction project. This is your foundation.
- Add the beef layer:
- Spoon about a quarter of your seasoned beef right into the center—you're aiming for a generous mound that doesn't quite touch the edges.
- Drizzle the nacho cheese:
- Pour about a quarter of the cheese sauce over the beef in a spiral pattern so it coats everything evenly. Don't be shy here; the cheese is what binds everything together.
- Place the tostada shell:
- Set your crispy shell flat on top of the cheese and beef—this creates a structural layer that will stay crunchy even after grilling.
- Spread the sour cream:
- Use about 2 tablespoons and spread it across the shell like you're frosting a cake. It'll help anchor the fresh toppings.
- Add the fresh toppings:
- Layer your lettuce, tomato, and a handful of shredded cheddar on top. This is where everything gets colorful and fresh.
- Fold the edges up and seal:
- This is the moment that separates a Crunchwrap from everything else—carefully fold all four edges of the tortilla up and over the center, creating little pleats as you go to seal in all the filling. If you have a gap in the middle, tear a small circle from an extra tortilla and place it over the filling before final folds.
- Grill it until golden:
- Heat your skillet with a tablespoon of oil over medium, then place the Crunchwrap seam-side down and cook for 2 to 3 minutes until the bottom is golden and the edges are sealed. Flip it carefully and cook the other side the same way.
- Slice and serve hot:
- Cut it in half and serve while everything is still warm and the tortilla is still crispy.
 Save
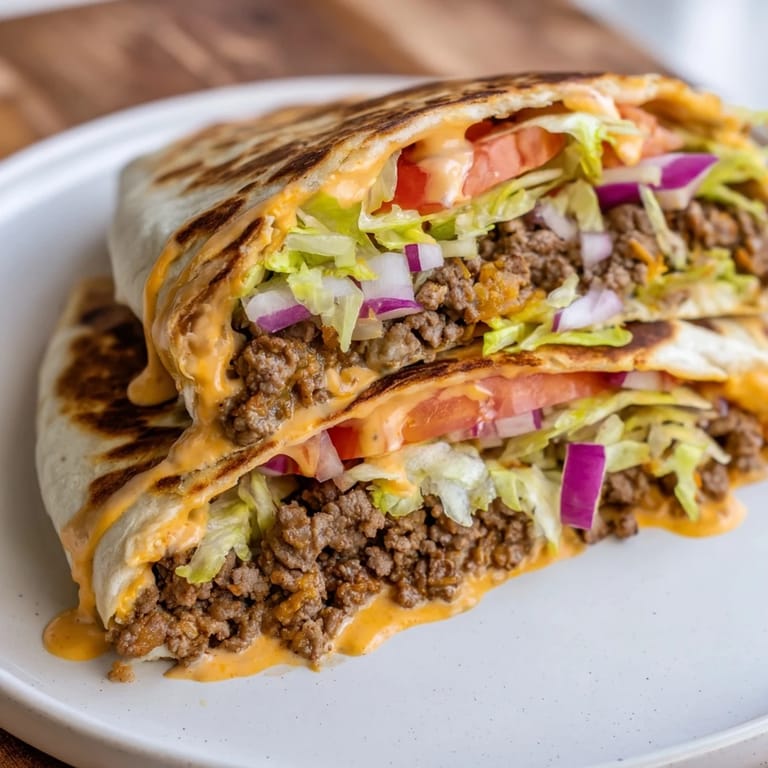
Save There's a moment when you pull that first Crunchwrap out of the skillet and it's golden and steaming, and you cut it in half and see all those perfect layers intact—that's when you realize you've made something that tastes like the real deal but somehow better because you made it yourself. It's the kind of dish that reminds you that restaurant favorites don't have to stay restaurant favorites.
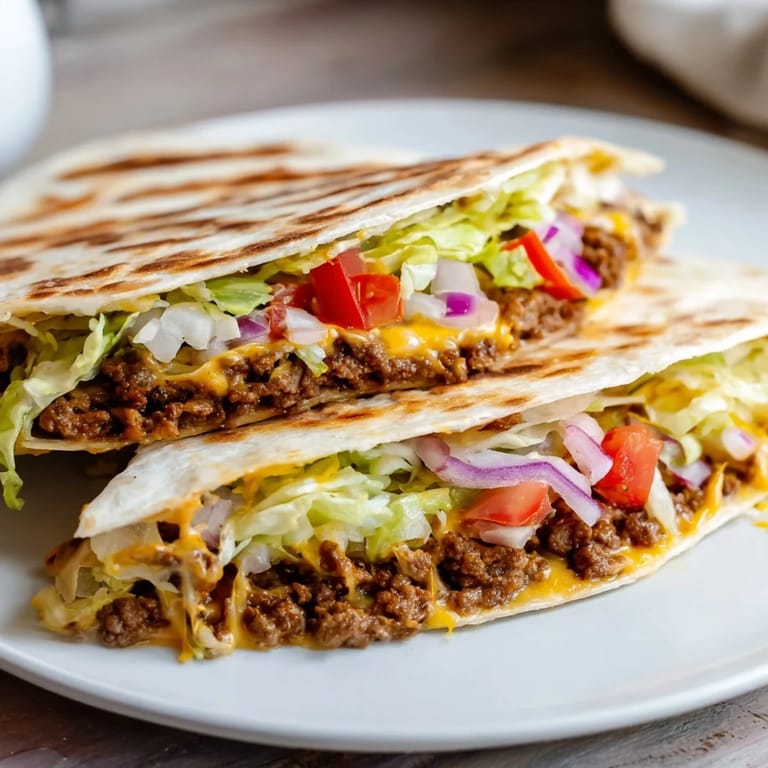
Building the Perfect Crunchwrap
The architecture of this wrap is what makes it work—you're layering textures and temperatures so that every single bite gives you something different. The beef provides savory warmth, the cheese adds creaminess, the tostada shell gives you that crucial crunch, and the fresh toppings keep everything from feeling heavy. When you fold it all together and seal it on the griddle, you're not just making food; you're engineering an experience that hits all your senses at once.
Customization Ideas That Actually Work
One night I made these with ground turkey instead of beef because that's what I had, and honestly, they were just as satisfying—leaner but still flavorful when you've got that seasoning doing its job. I've also tried adding jalapeños, swapping in different hot sauces, and even experimenting with different cheeses, and every version taught me something new about what makes this wrap special. The beautiful thing is that the structure is solid enough to handle whatever ingredients you want to play with.
Making Them Ahead and Reheating
If you're thinking ahead for meal prep or need to make these in advance, you can assemble them all the way through the sour cream and toppings stage, wrap them in foil, and refrigerate for up to a day—just grill them straight from cold and add a minute or two to the cooking time. They won't be quite as perfect as fresh, but they'll still beat any drive-thru version by a mile, and you'll love how easy it is to just heat and eat on a busy evening.
- Assemble everything the night before and you've got dinner ready to hit the skillet the next day.
- Store assembled wraps in an airtight container with parchment between them so they don't stick together.
- Leftover seasoned beef keeps in the fridge for three days and works in tacos, nachos, or quesadillas.
 Save
Save Making these at home changed how I think about fast food cravings—now when someone mentions wanting a Crunchwrap, I just smile because I know I can have one on the table in less time than a drive-thru trip. It's simple, delicious, and tastes like you actually put in effort.
Recipe Q&A
- → How do I prevent the tortilla from tearing when folding?
Use room-temperature tortillas and fold gently to create pleats. Place a small extra tortilla piece over the filling to cover gaps before folding.
- → Can I substitute the beef with other proteins?
Yes, ground turkey, chicken, or plant-based crumbles work well and can be seasoned similarly for taste.
- → What is the best way to warm the nacho cheese sauce?
Heat the sauce gently on the stove or microwave until warm and pourable to avoid separation.
- → How should the crunchwraps be cooked for best texture?
Grill in a lightly oiled skillet over medium heat for 2–3 minutes per side until golden and sealed, ensuring a crispy crust.
- → Are there any allergen concerns to be aware of?
The dish contains wheat, milk, and possibly soy depending on ingredient brands—check all labels carefully if allergies are a concern.