 Save
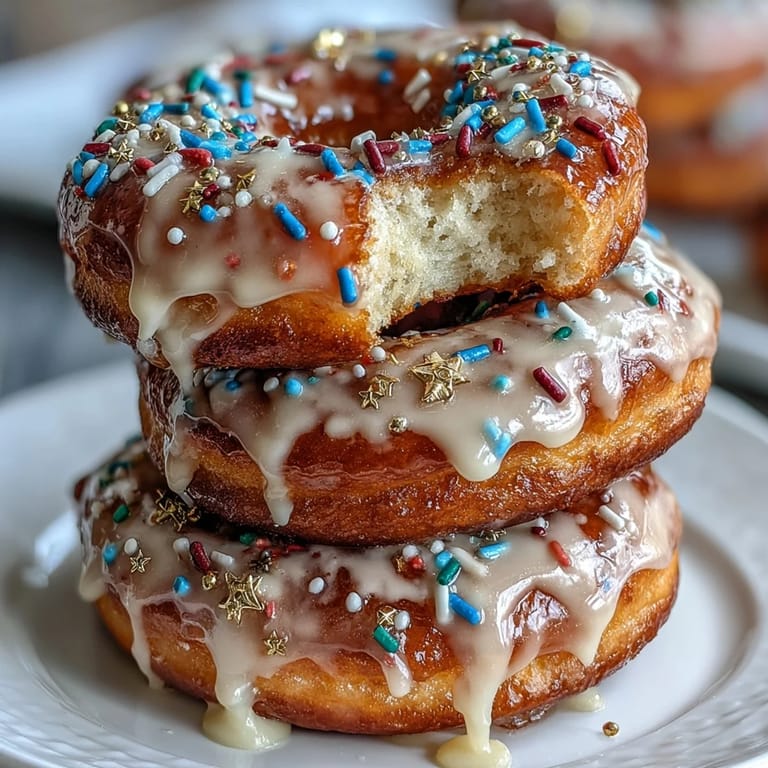
Save When I first arrived at my cousin’s graduation, the air was electric with anticipation, and I immediately noticed the dessert table. Towering at its center, glittering with sprinkles and edible stars, was a donut masterpiece. I couldn't help but lean in for a closer look—someone had outdone themselves, and I knew right then I had to learn how to make one. It was as if the celebration had crystallized right there in pastry form, quirky and jubilant. Ever since, a donut tower has become my signature move for celebratory gatherings.
Last summer, while balancing an armful of sprinkles and toppers, my niece ran over and whispered she wanted to help arrange the donuts—her tiny hands absolutely determined to find the perfect spot for every pink frosted ring. We ended up laughing our way through a little donut geometry and ended up with a slightly lopsided (but famously delicious) tower that everyone loved more than if it had been perfect. These moments, surrounded by a kitchen full of flour-dusted friends, are what make party food memorable for me.
Ingredients
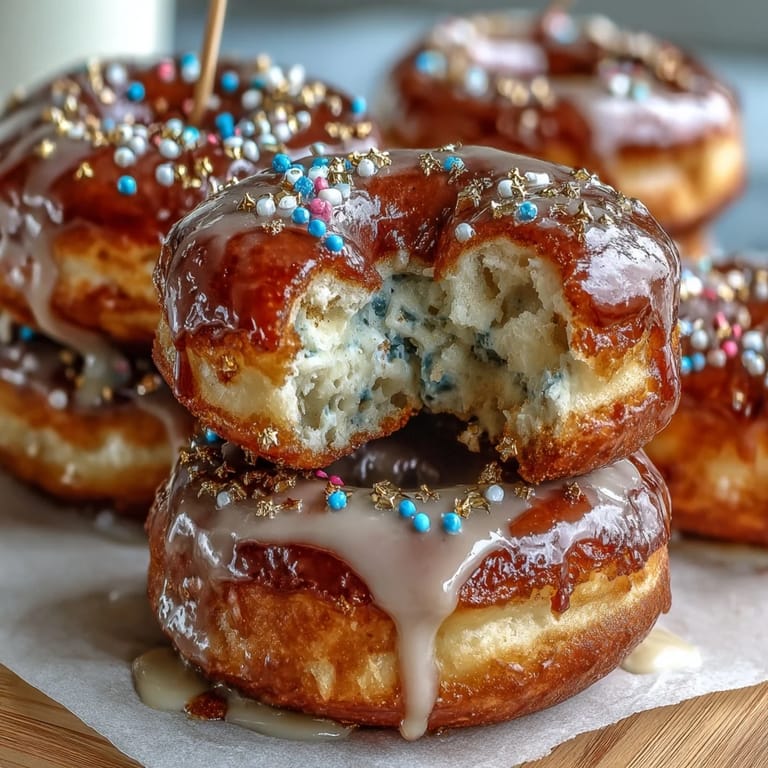
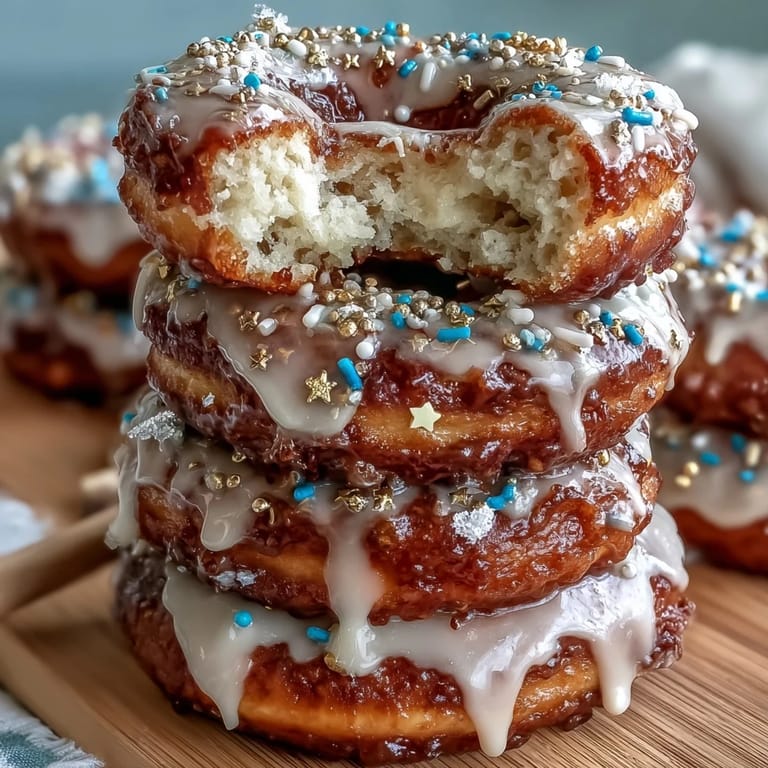
- Mini Glazed Donuts: Choosing mini donuts lets you pack more onto the tower, and I’ve found that fresh bakery donuts hold up best—just be gentle stacking them, as they can squish.
- Powdered Sugar: This makes dreamy, glossy icing; sift it first so you don’t get tiny lumps.
- Milk: Adjust the amount gradually to get that perfect pourable consistency.
- Vanilla Extract: Just a teaspoon adds nostalgic, creamy sweetness to your icing.
- Colorful Sprinkles: Don’t be shy—mix and match shapes and colors to suit your celebration and mood.
- Edible Gold Stars: Sprinkling these at the end always adds a wow moment, especially under the light.
- Graduation-Themed Toppers: These little picks shout celebration—use them for the finishing touch or to mark the top tier.
- Styrofoam Cone Base: An absolute essential for structure—just wrap it in parchment if you want to keep it food-safe.
- Wooden Skewers or Toothpicks: There’s an art to angling them just right so your donuts don't tumble at the finish line!
Tired of Takeout? 🥡
Get 10 meals you can make faster than delivery arrives. Seriously.
One email. No spam. Unsubscribe anytime.
Instructions
- Prep the Donuts:
- If making your own donuts, let them cool completely and steal one for quality assurance before starting.
- Mix Up the Icing:
- In a big bowl, whisk together powdered sugar, milk, and vanilla until silky—adjust milk drop by drop so you don’t end up with a runny mess.
- Dip and Sprinkle:
- Turn your kitchen into a sprinkle zone: dip the donut tops, watch the glossy icing settle, and immediately shower them with color.
- Prep the Tower Base:
- Place your cone on a platter and double-check its balance—an uneven base means an unpredictable tower (I learned this the exciting way).
- Build the First Layer:
- Secure donuts around the cone’s bottom with skewers, gently pressing to anchor each one without squishing the glaze.
- Keep Stacking:
- Work your way up, overlapping slightly—sometimes I hum a little tune to keep my patience as the tower grows tall.
- Fill Fun Gaps:
- Wedge in extra donuts wherever you spy holes, letting a little imperfection add to the charm.
- Add Sparkle and Decor:
- Dust the masterpiece with more sprinkles, gold stars, and finally, perch a graduation topper proudly at the peak.
- Show Off and Store:
- Let the icing set for about 15 minutes, then serve within two hours for peak freshness and wow factor.
 Save
Save The donut tower isn’t just a dessert; it’s a celebration centerpiece that has sparked spontaneous toasts, lots of selfies, and cheerful, sugar-dusted memories with every gathering. When people start dismantling the tower, you know the party is in full swing—and everyone wants to be the one who gets the donut with the most sprinkles.
How to Make It Your Own
Every time I build this dessert, something new happens—once, we swapped in chocolate and filled mini donuts that disappeared before we’d even finished decorating. Don’t be afraid to use different glazes, experiment with themed sprinkles, or layer in fresh fruit between the donuts for pops of color and flavor. I learned that donut towers thrive on improvisation and personal flair—there’s absolutely no wrong way to do it.
Serving and Display Secrets
I always set my donut tower on the shiniest platter I can find and gather plenty of napkins, because hands go straight in. If you want a true moment, place it where the light hits and let your guests do the unveiling—someone will inevitably want to pose with their favorite donut for photos. It’s a conversation starter, so make sure it’s front and center.
Accompaniments That Make It Unforgettable
A little tray of chocolate and caramel dipping sauces beside the tower never fails to induce smiles, especially when a guest dips their donut with exaggerated finesse. A few glasses of sparkling cider (or champagne for the grownups) keep things extra festive, and for a serious finale, a generous pour of sprinkles over the serving table brings everyone together for a final cheer.
- If you’re short on time, use all store-bought donuts—no one will mind.
- Pre-skewer the lowest tiers for ultimate stability if you’re moving the display.
- Have extra sprinkles on standby for last minute touch-ups or “oops” moments.
 Save
Save I hope your donut tower brings as many laughs and sweet surprises to your celebration as it has to ours. Here’s to honoring every graduate in style—one sprinkle at a time.
Recipe Q&A
- → How do I keep donuts from slipping on the cone?
Use short wooden skewers to anchor each donut into the cone and slightly overlap layers. Press gently so donuts sit snugly; chilled donuts hold their shape better during assembly.
- → What glaze consistency works best for coating?
A thick but pourable glaze is ideal: 2 cups powdered sugar with 3–4 tbsp milk and 1 tsp vanilla. Thin with milk a teaspoon at a time until it coats but doesn’t run off immediately.
- → Can I use filled or mini chocolate donuts?
Yes. Mix flavors and textures for visual interest. Reserve filled donuts for higher layers where they’ll be less compressed, and use plain or sturdier minis at the base.
- → How long can the tower sit before serving?
Once assembled and decorated, present immediately or keep covered at room temperature for up to 2 hours to preserve glaze texture and freshness.
- → Any tips for glazing and sprinkling cleanly?
Dip donut tops and let excess drip on a wire rack, then transfer to a tray and sprinkle immediately so decorations adhere. Work in small batches to avoid sticky clumps.
- → What base options work besides a styrofoam cone?
A cone-shaped cake form or a sturdy paper cone on a heavy platter works. Ensure the base is stable and anchored to the serving platter to prevent tipping.